
Two ways to place the form
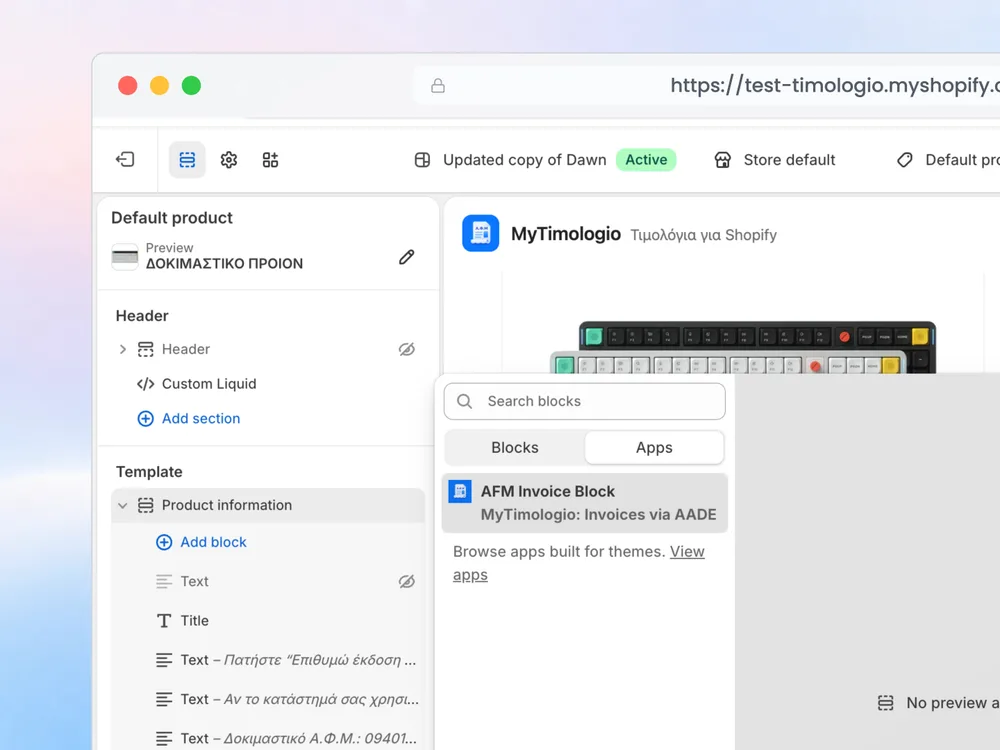
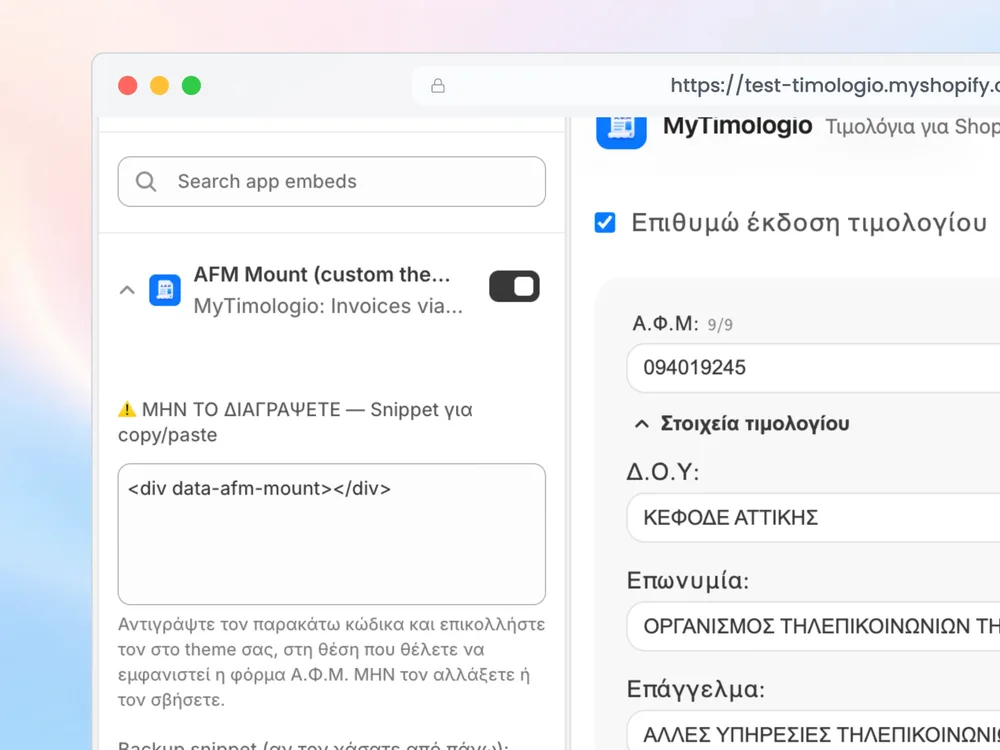
Product / cart page: add the app block in the theme editor. Cart drawer / custom position: enable the app embed and add one line, <div data-afm-mount></div>, above the checkout button. You can use both the cart page and drawer.
Free installation by the developer
Email [email protected]. Installation usually takes about 5 minutes, with collaborator access only to view and edit the theme, without orders, customers or access to the app itself. Shopify groups some theme permissions in the same request category. Remove access afterwards or ask for it to be removed.
Cannot accept the request / 6-digit code
- In Shopify Admin open Settings / Users / Requests.
- Open the request from 5_Minutes_Logo.
- Enable a secure two-step sign-in method.
- Shopify sends a 6-digit code to your email or phone. Enter it in Shopify.
- Select Accept request.
1. Install and review the subscription
Open the Shopify App Store listing, select the intended shop and review the permissions. Open MyTimologio in Shopify Admin. Check Shopify’s charge approval screen before accepting a plan and select the VAT coverage you need in settings.
2. Place the storefront form
For a supporting Online Store 2.0 template, open the theme editor on the product or cart page. Add the MyTimologio app block and save. Choose a position the customer reaches before checkout.
For a drawer or custom position, enable the MyTimologio app embed and add this snippet where the form should appear, above the checkout button:
<div data-afm-mount></div>
Both steps are required. Test on a theme copy before changing theme code, or ask for the free installation assistance described inside the app.
3. Add the optional Shopify blocks
On Shopify Plus, add the checkout form through the checkout editor. The separate Thank you details box is available on all plans: add it through the Thank you page editor and save. Add admin blocks to orders, drafts or customer records if staff need manual lookup and reuse.
4. Place and inspect a test order
Use authorised test details. Check an invoice request and a receipt choice, including mobile and any Buy now route. Inspect Additional details on the completed order. Confirm the choice, VAT number, company and address. Do not use real customer information in public screenshots.
5. Verify your provider’s handoff
Ask your ERP or invoicing provider to read the exact order fields. Test a later correction and an unresolved validation state. Your existing system issues the document and handles myDATA; installation of this form does not replace that responsibility.
Related questions
Cart page or cart drawer — where can the form go?
Both. Use an app block on the product or cart page. For a cart drawer, enable the app embed and add <div data-afm-mount></div> above the checkout button. You can place the form in both locations to collect details when customers go straight from the drawer to checkout. Test each buying route.
What about Buy now and accelerated checkout?
A route that skips the product or cart form can reach checkout without captured details. Test Buy now, accelerated buttons and your mobile purchase path separately. The Plus checkout block is a distinct placement; no blanket guarantee is made that every express flow shows or requires the form.
What must our ERP integrator map?
Read Additional details: customAttributes in Shopify, or note_attributes in order webhooks. Map the exact keys «Έκδοση Τιμολογίου» (ΝΑΙ / ΟΧΙ), «Α.Φ.Μ», «Επωνυμία», «Δ.Ο.Υ», «Επάγγελμα», «Διακριτικός Τίτλος», «Οδός», «Αριθμός οδού», «Πόλη», «Τ.Κ» and «Χώρα» to the ERP customer card and order. Recognise invoice requests by the «Τιμολόγιο» tag and match an existing or new customer by VAT number. Everything else in the sync continues as before.